Twice last summer, my cat left me a gift in the garage. Can you see where this is going? Both times he left me dead lizards. So gross! I do not like cleaning those up. Ick! This led me to notice that there was a gap in the bottom seal of the garage door where the culprit probably came in.

I kept forgetting to really look at the seal and take measurements, but always had it in the back of my head to look for it at Home Depot. So, the other day when I was there, I finally came across the seal, while looking for something else (of course). There was only 2 different kinds, so I bought the one that seemed right and figured if anything, I can always return it. This is what I bought.

So, when I got home, I carefully looked at the replacement seal and it seemed like it was the right thing. You're supposed to pinch it into a U-shape and the grooves on the edges are supposed to fit into the grooves at the bottom of the door.

I took off the seal that was already on the door, which was a bit of the pain, but I once I figured it out, it just took some arm muscles to slide it off. But, you know how things like this never really go smoothly for me right? Well, add this one to the list. I think sometimes I'm so excited to get something done that I don't take time to figure out the details first. Problem#1: the grooves on the edges were too big/wide. I tried thinning them out at the edges thinking that once I got the seal in the groove at the bottom of the garage door that I could just maneuver the rest in. What a sucker I am. That definitely didn't work. Problem#2: the seal was not long enough. Most of the houses here in Southern California (at least in all the neighborhoods I've ever lived) have 2-3 car garages. So, it never occurred to me to check if the length was long enough. Um, yeah - it wasn't. It was long enough for a 1 car garage. Darn! Since I already cut the seal, I couldn't return it. With quick-as-lightning thinking, I decided to cut a piece big enough to fill the gap and that would help to keep any critters out. So, I cut the piece and had to trim the grooves on the edges to make them thinner so it would fit in the grooves on the garage door. It took a lot of trial and error to get the trimming part done just right, but it worked.

Ta da!
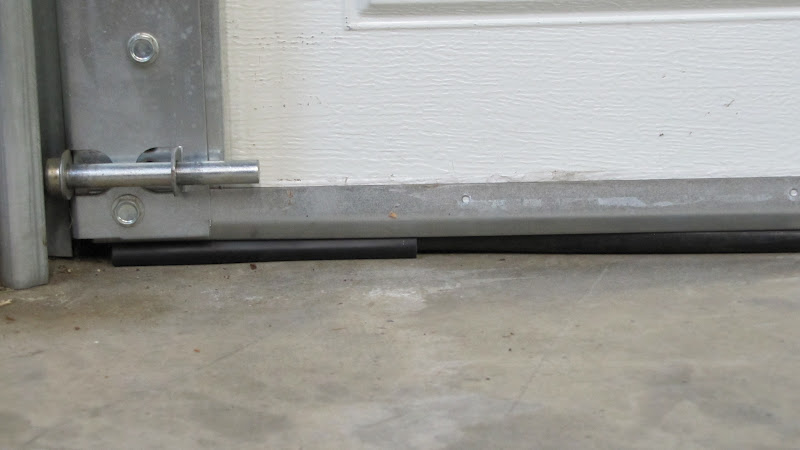
You can see in the first picture that the new piece is the darker & cleaner one on the right. The "action photo" is on the second picture with the new piece on the left. It would have been nice to have a brand new seal for the entire span of the door, but this will serve it's purpose! I'm glad that's finally done and now the critters don't have a way inside anymore. Which is lucky for them - beware of cat!
No comments:
Post a Comment
I would love to hear from you. Feel free to leave a message below - I will respond back via email, but if you have a no-reply or don't leave an email address, then I will reply below your comment. Thanks for taking the time to visit and commenting! It's much, much appreciated.